
“The Microsoft Access 2016 Runtime enables you to distribute Access 2016 applications to Users who do not have the full version of Access 2016 installed on their computers.”
To download click here…
![]()
|
||||||
 Access MVP (2010-2015)
") |
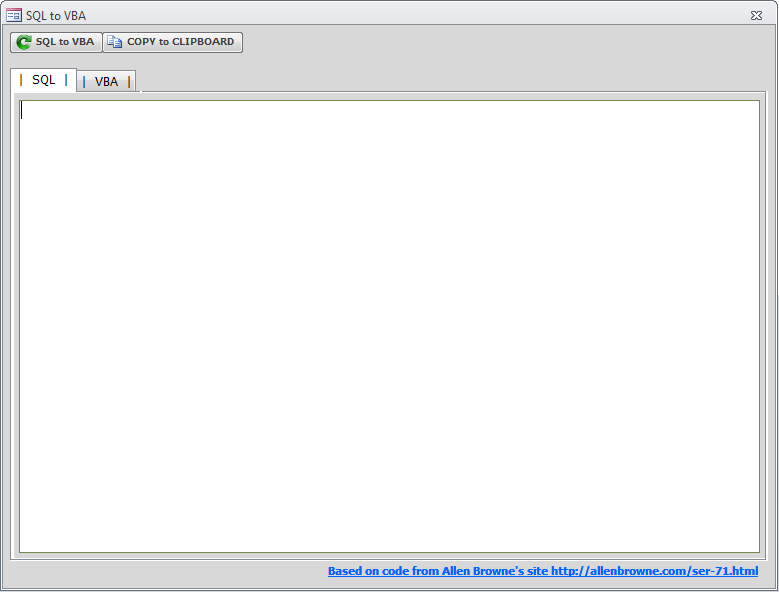
“The Microsoft Access 2016 Runtime enables you to distribute Access 2016 applications to Users who do not have the full version of Access 2016 installed on their computers.” To download click here… Recently, I saw a post regarding moving a Query (SQL) to VBA. I remember I saw something somewhere that automated this task but could not remember where. Well, after a little surfing of my favorite sites I found it… Copy SQL statement from query to VBA by Allen Browne. And, because I couldn’t leave well enough alone, I created the database following the steps listed and, for fun, added a *Copy to Clipboard* button just so you can now click the button and paste, with Ctrl+V, right into the VB Editor…
…and you can download it here. Note: The SQL cannot be used as RowSource for any Control or RecordSource for any Form. 11.13.2015 Amended so you can now also convert INSERT, DELETE and UPDATE queries as well. Enjoy! Normally, it’s not an issue if an End User tries to type in more characters than the Control will allow… they just can’t type anymore. BUT, if you are using an UNBOUND Form for data entry this is a big problem, they will not be able to Save and with a not so nice message. Let’s fix that… Step 1Add a TEXT BOX under the Control on your Form named txtCharactersAllowed. In the Properties window for this Control set Enabled to False and Locked to True. This will make it so the TEXT BOX will not react when the User mouses over it and will display a *### characters left* message. Step 2In the On_Change Event Procedure for the Control on your Form place…
     Me.txtCharactersAllowed = 150 - Len(Me.txtYourControlName.Text) & " characters left"

        If Len(Me.txtYourControlName.Text) = 150 Then
           MsgBox "No more characters allowed - Entry will not save!", vbCritical + vbOKOnly, "Character Limit"
        End If
Note, in this example the maximum length of the field is 150, be sure to change to reflect the maximum characters allowed for your field. Step 3Just in case they ignore that message, I add this to the Save Command Button right at the top.
     Me.txtYourControlName.SetFocus

        If Len(Me.txtYourControlName.Text) = 150 Then
           MsgBox "You have exceeded the character limit allowed, adjust and try again!", vbCritical + vbOKOnly, "Save"
        Exit Sub
        End If
Stops the Save until they adjust and no ugly message and, oops, all their hard work just gone. Yep, you read that right… Microsoft has opened up a UserVoice site where YOU can suggest features or improvements you’d like to see in Microsoft Access Desktop and Web Apps, as well as, vote on suggestions made by others. This is a great opportunity for YOU to pass on your ideas directly to the Product Team. Have a look… Welcome to Access Suggestion Box! Here you go… click here by Guest Poster Priyanka Chouhan
Microsoft Access is a Database Management System, a part of Microsoft office suite of products. This application allows Users to utilize QuickBooks data files just like Access databases. Steps to create a table in Microsoft Access with QuickBooks:
Here are the steps to build a linked table in MS Access:
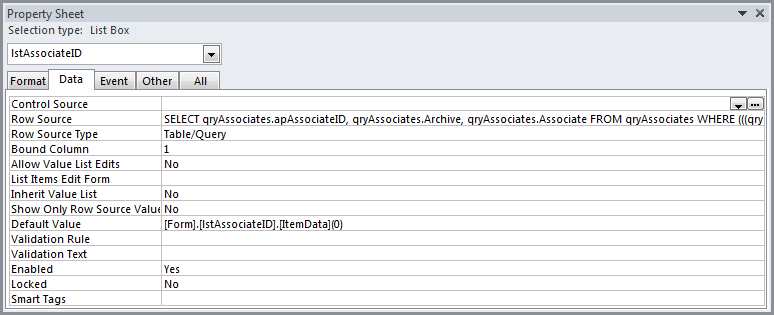
Note: If you are working with the application, which is not fully compatible with ODBC, but getting data from Access tables and want to make it compatible with QuickBooks tables, then run Microsoft Access setup like above mentioned steps. Author Bio: Priyanka Chouhan is a technical writer in Stellar Data Recovery with 5 years of experience and has written several articles on MS Access databases. In her spare time she loves reading and gardening. You have List Box and you want the first item to be selected… For VBA use… or In the Properties window, on the Default Value line, of the List Box use… To run a Query from your Desktop without actually opening your Database… 1. Open your Database 2. Select the Query you want to run and drag it to your Desktop 3. Close your Database and then double-click the Query on your Desktop I use Initials in Combo Boxes for space conservation on a Form. I don’t depend on the User to enter them, instead, I enter the below in the After_Update event of the Last Name Control on my Form…
Me.txtAssociateInitials = Trim(Left(Me.txtFirstName, 1)) & Trim((" " + Left(Me.txtMiddleInitial, 1))) & Trim((" " + Left(Me.txtLastName, 1)))
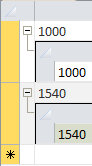
Okay, so we all know I recommend turning off the SubDatasheet but I can see by the Forums they are still quite popular. For those of you that are still using them… When you first open your Main Form/Subform (Datasheet View) it opens closed (Little plus signs). This is often quite annoying to Users as they are the ones that have to click all those little plus signs to see the data in the SubDatasheet. So, let’s fix that!
In the On_Load event of the Main Form put… Private Sub Form_Load()
     With Forms("YourMainFormName")
         .SubdatasheetExpanded = True
     End With
End Sub Then the next time you open the Form…
|
") Have an Access... ential you want to share? Drop me a line!
Note, all tips are moderated before posting.
Have an Access... ential you want to share? Drop me a line!
Note, all tips are moderated before posting. |
||||
|
Copyright © 2026 Access… entials - All Rights Reserved Powered by WordPress & Atahualpa |
||||||

 Enjoy!
Recent Comments
No comments.