Access MVP (2010-2015)

oOo.oOo.oOo.oOo.oOo.oOo

Appointment Collision Check

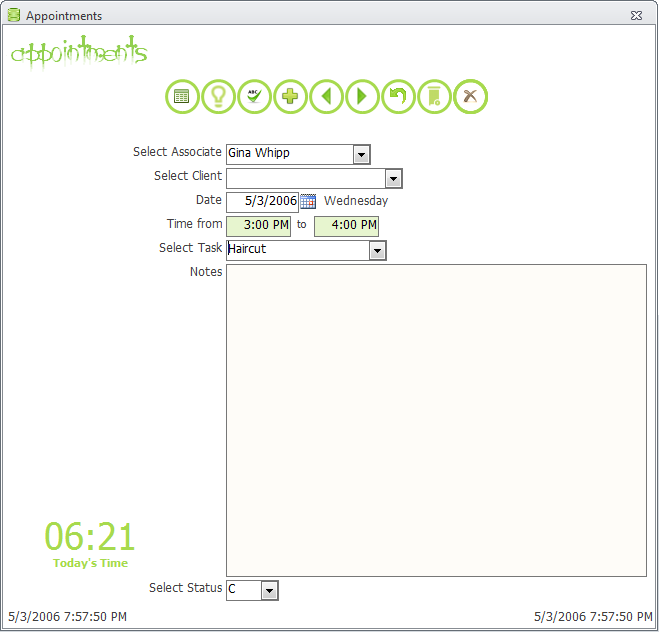
You’ve created a database for scheduling appointments, one little problem when entering these appointments you can’t tell if it clashes with another appointment (especially, if you are not the only one entering).  You could use a query but I always thought this would be handled better in a Module besides, I had an old database from 2002 (sorry, site no longer up so I can’t post a link) that was already part of the way there.  So, this looked like a good time to *make it work*!  Let’s get started…

My parameters:

(In this example I am using the below table, you will need to change the names here and in the Module to match yours.)

tblActivities
aActivityID (PK, Autonumber)
aAssociateID (FK related to tblAssociateProfile, Number, Long Integer)
aDate (Date/Time, Short Date [ No need to use Input Mask at Table Level ])
aStartTime (Date/Time, Medium Time [ Input Mask: 99:00\ >LL;0;_ ])
aEndTime (Date/Time, Medium Time [ Input Mask: 99:00\ >LL;0;_ ])
etc…

Module (Named: modCollisionCheck)…

You can incorporate into an already existing Module but for ease you can copy/paste the below into a new Module.

Option Compare Database
Option Explicit

Public pubActivityID As Long

Public Function getActivityID()
    getActivityID = pubActivityID
End Function


Function fCollisionCheck(dteDate As Date, stStartTime As Date, etEndTime As Date, lngAssociateID As Long)
'7.11.2016 rtw modified
'https://www.access-diva.com/blog/p=397
    
    Dim dbDuration As Double
    Dim se As Date 'Starting time of appointments already made (in table)
    Dim ee As Date 'Ending time of appointments already made (in table)
    Dim blCollision As Boolean
    Dim db As DAO.Database
    Dim rs As DAO.Recordset
    Dim frm As Form
    
    Set frm = Screen.ActiveForm
    Set db = CurrentDb
    Set rs = db.OpenRecordset("tblActivities", dbOpenDynaset)
    
    blCollision = False
    frm.lblCollisionCheck.Caption = " "
    dbDuration = etEndTime - stStartTime
    
        With rs
          Do Until rs.EOF
          'First check if the appointment date on the form is the same as the record in the table.
          'The recordset could be filtered at this point thus avoiding
          'to have to loop through all the records in the Appointment table.
          If !aDate = dteDate And !aAssociateID = lngAssociateID Then
              se = !aStartTime
              ee = !aStartTime + dbDuration
            'Lembit Soobik's nifty formula for checking collisions
            If stStartTime < ee And etEndTime > se And pubActivityID <> !aActivityID Then
                blCollision = True
                frm.lblCollisionCheck.Caption = "Collision"
                'MsgBox "Collision with Appointment ID: " & !aActivityID & vbCrLf _
                & "Starting at: " & se & vbCrLf _
                & "Ending at:  " & ee, vbExclamation, "Collision Check"
            End If
          End If
            .MoveNext
          Loop
            rs.Close
            Set rs = Nothing
        End With
    
    db.Close
    Set db = Nothing
        
        If Not blCollision Then
          frm.lblCollisionCheck.Caption = " "
          'MsgBox "No collisions encountered", vbInformation, "You made it"
        End If

End Function
Form…

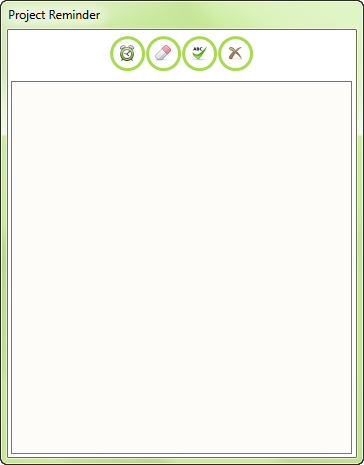
Place Label, lblCollisionCheck, on your Form, in this example it’s above the Command Buttons.  You will need to place one on your Form use that potion of the code.  However, if you like you can comment out those lines and use the lines below that are pop-up messages.  (I personally like the Label as no extra clicking required by the End User.)

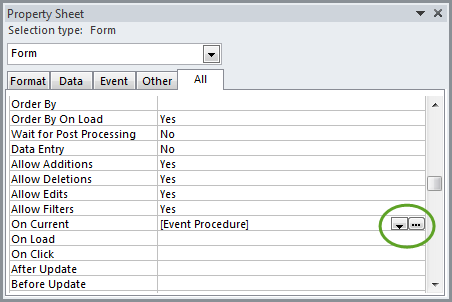
To use the Module above the Form must be set to Pop-Up = No. If you want the Form to be a Pop-Up in the Module above you must change this…

Set frm = Screen.ActiveForm

to

Set frm = Forms![YOUR FORM NAME]

Side Note: If you want to use a Main Form\Subform set up then the lblCollisionCheck must be on the Main Form, all other Controls can be on the Subform.  Since we are reading the Recordsource of the Subform no need to *worry about* the other Controls.

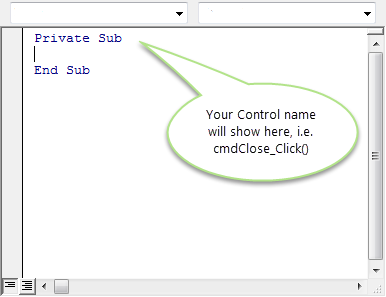
In the After_Update event of txtStartTime place (note the name of the Controls):

    If Not IsNull(Me.txtEndTime) Then
            Call fCollisionCheck(Me.txtDate, Me.txtStartTime, Me.txtEndTime, Me.cboAssociateID)
    End If

In the After_Update event of txtEndTime place (note the name of the Controls):

    pubActivityID = Me.txtActivityID
    
    Call fCollisionCheck(Me.txtDate, Me.txtStartTime, Me.txtEndTime, Me.cboAssociateID)

In the Lost_Focus event of both the txtStartTime and txtEndTime place (I like the extra Save.):

DoCmd.RunCommand acCmdSaveRecord

In the Forms On_Close event (We want to remember to drop the Public Variable when closing the Form in case we want to use it elsewhere.):

pubActivityID = Empty

Appointments

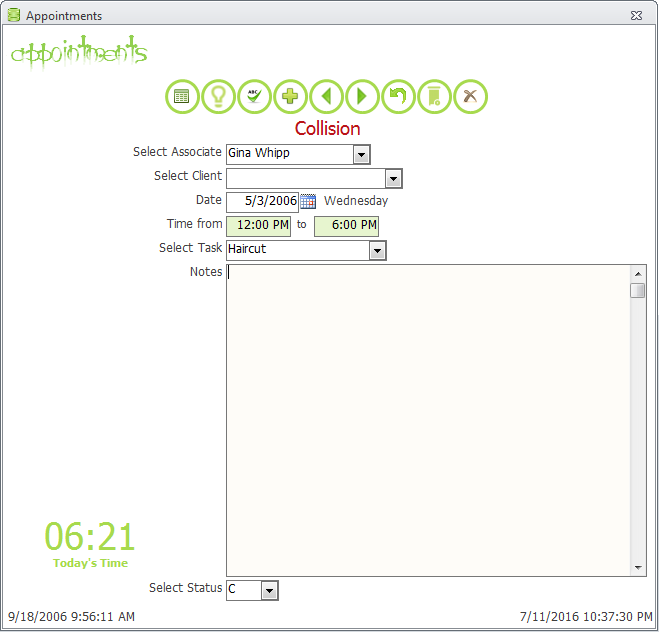
So, if you enter an appointment that conflicts with another one (See the message?)…

appointmentsCollision
Now, just change the time and message, Collision, will go away provided there still isn’t one!

 1,537 total views

Create a Splash Screen (Simple)

SplashScreen

To create a Splash Screen using a Form…

  1. Create a new Form
  2. In the Properties Sheet set…
    • Set the Border to None
    • Set Auto Center to Yes
    • Set Pop Up to Yes
    • Set Moveable to No (optional)
    • Set the Timer Interval to the amount of time (in milliseconds) you want the Splash Screen to stay open, i.e. 5000 = 5 seconds
    • In the On Timer Event Procedure place DoCmd.Close
  3. Save, close and double-click to reopen and test.  Click here to download a sample.

P.S. Splash Screens are especially handy if you want to preload some data before the database actually opens.

 7,977 total views,  2 views today

Adding a custom image to a Command Button

A little tired of the stock images that come with Access?  You can add your own…

Step 1 – In Design Mode of your Form (if the Property Sheet is not open do so now) click on the Command Button.  Then in the Property Sheet select the Ellipse button, the one with the three dots, on the Picture line…

PictureNone

…and the Picture Builder window will open…

PictureBuilder

Step 2 – From the Picture Builder window select Browse… and the Insert Picture will open.  In the lower right hand corner you will see…

Bitmap
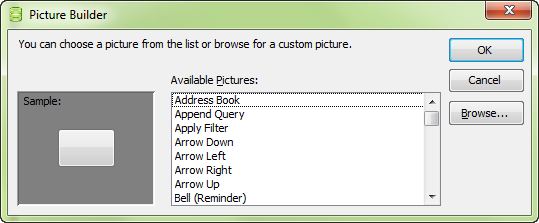
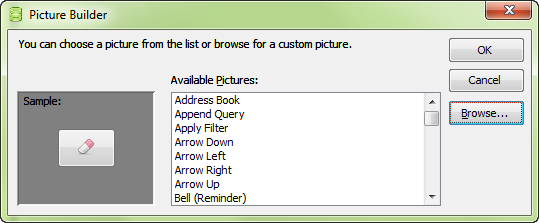
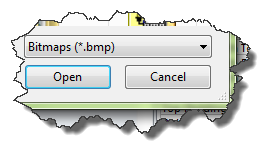
Where is says Bitmaps (*.bmp) select the drop down and change to All Files (*.*)

AllFiles
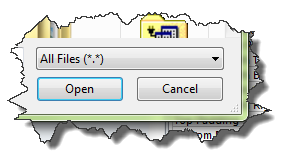
Step 3 – Navigate to the folder where you have the image you want to display on your Command Button and select the image…

SelectImage

…and select Open from the lower right hand corner.  Then select OK

OK

And, WA-LAH, your image is on your Command Button!

reminder


Tip:

In your Model Database create a Form that has all your *mostly used* Command Buttons.  Then when creating a new database you can easily copy/paste your Command Buttons from it to your Forms without going thru the steps above for each Command Button AND you have the added plus of setting up a Button Legend for the End Users.
buttonGlossarFullPage

 11,697 total views,  1 views today

Where to copy/paste Code

You found a piece of code, it says to copy/paste into the Event Procedure of your Control, great!  Hmm, now where exactly is that?

First, open you Form in Design Mode making sure the Property Sheet is open.  Select your Control and on the Property Sheet select the Event tab.

PropertySheet


Go copy the code you want to paste.  Then click on the line of the event you want to add the code to, i.e. the On Current.  From here you can click the Ellipse button, the one with the three dots, or you can first select [Event Procedure] from the drop down and then click the Ellipse button, pictured below.

PSEventProcedure


Once the Ellipse button is clicked the VB Editor will open…

VBE
Then paste (Ctrl+V) your code between the Private Sub… and End Sub.  To be sure it pasted correctly, at the top from the menu select Debug then Compile.  If there are any errors you can fix and then save and close (or close and save).

 1,257 total views,  2 views today

Tools, Utilities and more…


Recently, I watched Free Tools for Microsoft Access recorded by Crystal Long and Adrian Bell (Microsoft Access MVP’s) on Channel 9. Upon looking at comments below it dawned on me there is no central location for all those great free tools! How is anyone to find them? After all, you may not know they even exist let alone how helpful they can be to you in your development. So… I have added a new page just for them. (Okay, not all of them are free but most are.)

If you know of a free tool for Microsoft Access send me an eMail.

 654 total views

Importing into a *clean* Database

1. Create a new database naming it differently then the original.  (No worries you can rename it later.)

2. Uncheck Track name AutoCorrect info under File > Options > Current Database, as well as, any other options you don’t want.

3. Go to the External Data tab and select Access under Import.

4. In the Get External Data – Access Database window select Browse and navigate to the old file.

5. Then on the Table tab select only the tables that do not start with MSys*, if showing.  (If not showing on the right click Select All.)  Then select the balance of the tabs and where you find objects in the left pane click the Select All button on the right.

6. Then select OK and wait until done.

You now have your new database.  You will need to set up your Start Up Options again, if you have any because those do no come over to the new file.  Confirm that your new database works as expected and then you can save the old one as a backup or delete it.  Finally, rename your file.

 641 total views

Left-Handed Combo Boxes

I sometimes use Combo Boxes as *labels*.  This comes in especially handy in the communications section of the Contacts Form where any given Contact can have more than one eMail or more than one phone.

Left-handed Combo Box
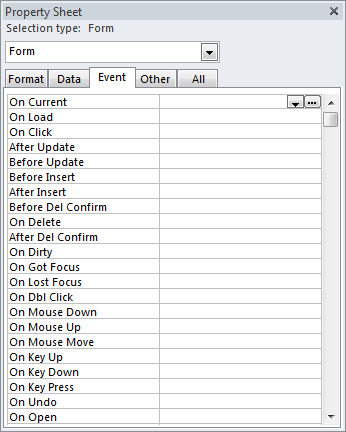
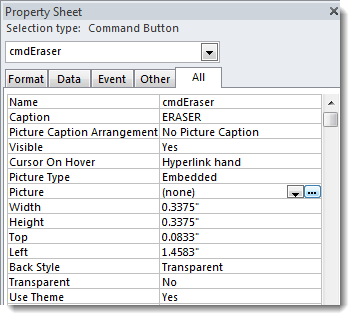
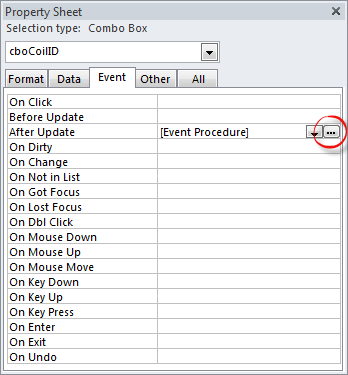
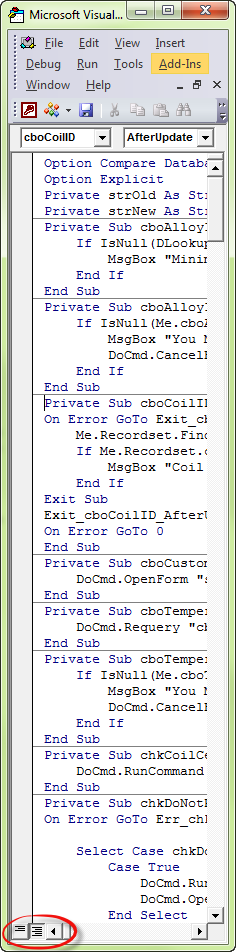
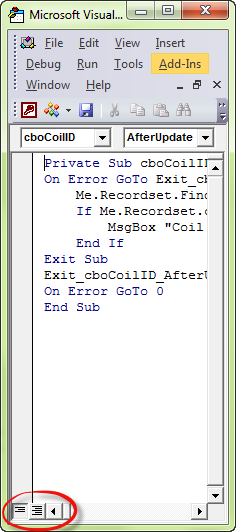
To move the drop down to the left… while the Form is in Design Mode click on the Combo Box.  (If not already open bring up the Property Sheet.)  Then on the Format tab of the Property Sheet scroll down to the bottom till you see Scroll Bar Align and change to Left… all done.

 683 total views

Changing a Label Caption on a Report

If you do Quotes and Invoicing (or Purchase Orders and Invoicing) they generally share the same layout, the only difference being the Label identifying them.  Rather than creating to reports you can change the Label Caption depending on which Form you are opening it from.

Step 1Caption

Create the Report and for the Label Caption put the name of the one that is used more often.  So, for my Report I put Invoice because I print a lot more invoices than I do quotes.  Make sure the Label is long enough to accommodate the character count of the longest word, i.e. Purchase Order.

Step 2
In the Reports On_Open event place…

 
  If Not IsNull(Me.OpenArgs) Then
      Me.Controls("lblInvoice").Caption = Me.OpenArgs
  End If

…save and close the Report.

Step 3
From the Form that you use to generate your Invoice there is nothing to do, so, go to the one that you use for Quotes.  In Design Mode go to the Command Button(s) you are using for Preview (and Print, if you have one).  Between the Private Sub… and End Sub enter…

    Dim strCaption As String
    strCaption = "Quotation"

Then depending on whether you have a WHERE clause…
No WHERE clause

    DoCmd.OpenReport "rptInvoice", acViewPreview, , , , strCaption

With a WHERE clause (This sample only includes where the WHERE would go.  🙂 )

    DoCmd.OpenReport "rptInvoice", acViewPreview, , strWhere, , strCaption

(Don’t forget some Error Code!)  Save, close and test! All done!

 2,514 total views

Data Models

Probably the hardest part of designing a database is constructing normalized tables.  Get them wrong and everything else is down hill… you can’t get the Forms to do what you want and the Reports just don’t work.  Let’s see if any of these can make your job easier…

Clubs (or Associations)

Complaints

DVD’s

Grocery List Maker

Hotel Bookings

Inspections

Jobs (or Works Orders)

Parking Lot

Products (Shoes or Clothing)

Property Management

Publications

Purchase Orders with Inventory

Real Estate

Recipes

Recipes with Grocery List Maker

Restaurant Reservations

Tasks

Training with Attendance

 593 total views

Procedure View vs. Full Module View

While developing you may find yourself in the VB Editor adjusting the Function for a Control or the Form itself.  When it opens you have to hunt down where the cursor is flashing, even though you have clicked the After_Update event for a specific control.  There’s an easier way…

  1. When you click the Build button on the event line for which you want to modify…
Step 1

Step 1


2.  The VB Editor opens and you see the entire VB Editor.  Rather than hunt down where the cursor is flashing…

Step 2

Step 2

3.  …select the Procedure View button located in the lower left hand corner of the VB Editor (see image below, Step 3).

Step 3

Step 3

Now you’re only going to see the Procedure for the Control you selected!  Pretty cool!


 854 total views